Category: Uncategorized

  • Whiteboard Animation on Mind Mapping using Audacity, Illustrator, and Animate

    Whiteboard Animation on Mind Mapping using Audacity, Illustrator, and Animate

    Title: Mind Mapping

    Audience: General

    Date: December 2024

    Software Utilized for the Project: Audacity, Illustrator, and Animate

    About the Project: 

    I am a passionate mind mapper. I use mind maps for everything, particularly brainstorming and synthesizing information before writing. I frequently show students how to mind map as a way to use informal writing to solve research writing problems. However, the maps that I make on the spot are pretty sloppy and don’t show the depth of thinking that mind maps can facilitate. I have some other mind maps that I spent a lot of time on, but I admittedly spent too much time on the visuals, so they’re also not good examples for encouraging students to think with mind maps.

    The topic of mind mapping lends itself to a whiteboard animation. Tools like Vyond and its competitors can create whiteboard animations more quickly than from-scratch animations. However, you can’t easily create a whole mind map and you’d be restricted in your design.

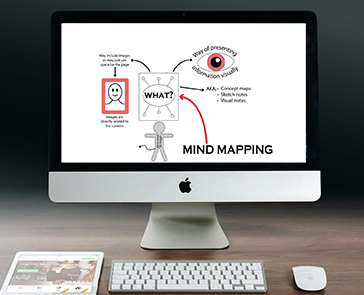
    I first created my mind map with pencil and paper, then translated that rough map into a digital file using Adobe Illustrator. Next, I turned my Illustrator file into a large PNG image and made it the base image in my Adobe Animate file. I put a white rectangle over the entire PNG file and slowly erased the cover in time to the narration.

    I ran into a few technical problems in Adobe Animate. Most animated scenes are very short, generally only a few seconds long and compiled in another program. However, because my mind map couldn’t be broken down into scenes, I needed to create the main animation in a single six-and-a-half minute timeline in Animate. To make the timeline a little more manageable, I used a low 12-frames-per-second rate. Additionally, there were some challenges to ensuring the audio and visuals aligned properly on the timeline, but I was eventually able to overcome those.

    This lesson will be useful to share with students doing research projects, although I intentionally kept it general enough to be useful to a broad audience. The link below leads to the video on YouTube, which includes captions.
  • Augmented Reality (AR) Using Blender and Adobe Aero

    Augmented Reality (AR) Using Blender and Adobe Aero

    Title: Roman Triclinium and Pompeii Bar

    Audience: Bucknell University students

    Date: Fall 2024

    Software Utilized for the Project: Blender, Adobe Aero, Photoshop

    About the Project: After taking a course on virtual and augmented reality (AR) in my instructional design program, I have been interested in applying small-scale AR in my practice at Bucknell University.

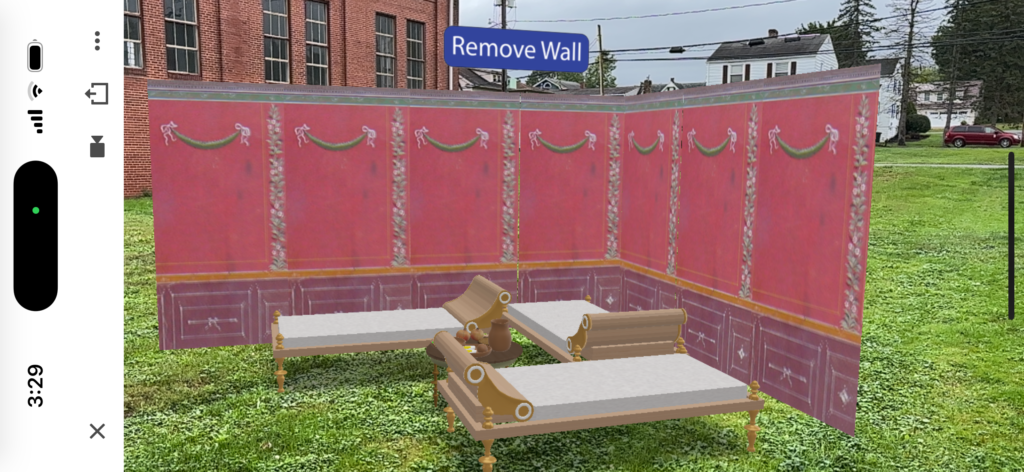
    In the summer of 2024, a Classics professor expressed interest in recreating scenes for her Archaeology of Food course in the fall. Her first request was a Roman triclinium, which is a dining room with couches as Romans ate while lying down.

    We met to discuss what she wanted and she provided me with a number of image references. I kept her informed on my progress as I learned Blender well enough to create the furniture. I struggled most with creating the headrests as they were a challenging shape to build.

    Once I had the couches and table built, I placed them in Adobe Aero with the wall, which I took from a museum image. As the wall could easily get in the way of students being able to explore the couches and tables, I added a little interactivity with a button that could remove or replace the wall.

    Roman Triclinium

    The last step was adding food to the table. The professor provided images of the kinds of food Romans would eat. I was able to download some from Sketchfab.com, although I was encountering large file sizes and materials errors when I brought them into Aero, which detracted from the learning experience. I was able to create some of my own food and plates in Blender and use some of the downloaded foods that were not causing issues.

    Implementation of this experience went well. One student reported being very happy to explore what they were learning about in class in this way and not just through 2D images in their textbook.

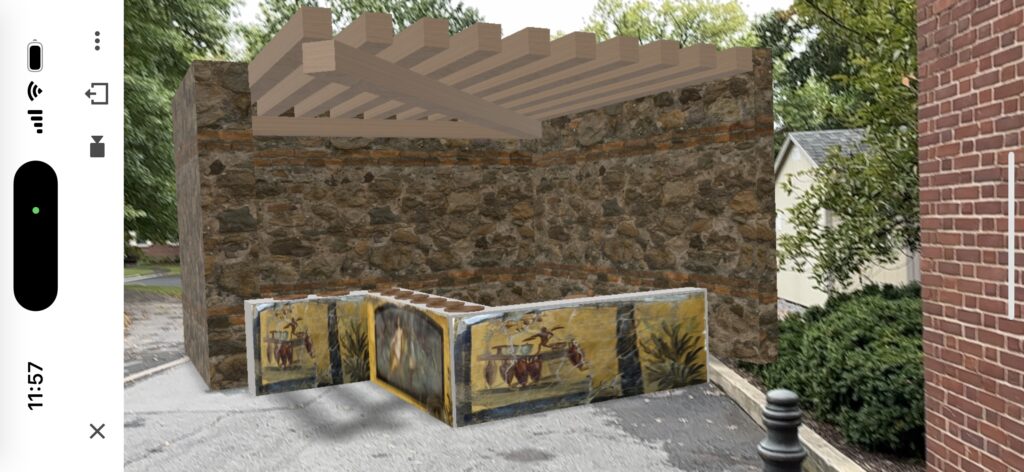
    I have also created a second experience for the class which will be implemented later in the semester. This is a recreation of a recently excavated bar in Pompeii. The counter contains numerous clay pots that would have been filled with various foods. The paintings are the actual paintings from the excavated site, which I was able to pull from images online, form into the correct shape in Photoshop, and apply to the counter in Aero.

    Pompeii Bar

    I hope these examples and students’ reactions to them will lead to more opportunities for 3D modeling and AR experiences at Bucknell University.